Showing posts with label SAMSUNG ROM. Show all posts

Wednesday, September 2, 2015

[HOWTO] Unbrick your i9000 / Galaxy S

Image result for galaxy s


http://forum.xda-developers.com/showthread.php?t=1886393

How to Unbrick Samsung Android Phones with One Click [Guide]

Normally Samsung android phones are so secure to flash. but you are unlucky and got your phone bricked during flashing,rooting or upgrading.
Here is a good news for You – A developer come up with a software called one-click unbrick for Samsung android phones. this small utility uses ODIN to repair our Samsung phones. almost all Samsung phones with android éclair and above can be repair with this tool (few exceptions – it is working on some Android 1.5 too)
one-click unbrick tool works on windows , Linux and mac also. it have some bugs in windows version but both Linux and mac working fine. don’t get worried about windows version if you are a window user. developers are continuously working on windows version for its stability
REQUIREMENTS TO UNBRICK YOUR PHONE
  • First install java on your pc if you haven’t java go to Java site and install it.
  • download one-click Unbrick tool
  • window users will need .rar/.zip extractor software , you can download free all in one (7zip) extractor form here.
FOLLOW THESE INSTRUCTIONS CAREFULLY
1. Right-click on the One-Click.jar file, move down to option “7-zip” and then select “Extract to OneClick”. (as shown picture below)
7_zip

2. Now you will get a ‘OneClick’ folder.
3. Now copy ‘OneClick.jar’ file and paste it into the ‘OneClickheimdalloneclickresourcesHeimdallPackage’ folder.

copy_one_click
4. Right-click on ‘oneclickloader.exe’ file and choose ‘Run as Administrator’.
5. Proceed with the installation of Heimdall.
6. After the installation is complete, you will see the the One-Click UnBrick interface.

one_click_unbrick
7. Connect the phone to computer via USB and click on “unsoft brick” button to recover your bricked Samsung android phone
[Img Credit dkszone]

How to unbrick Samsung Galaxy Y with stock firmware

Image result for galaxy y
Since the Galaxy Y launched in market by Samsung, it is always been very popular, and been searched widely over the internet. The combination of device cost, and configuration made it a good deal for phone users, and developers as well. Galaxy Y is one most sold handset from Samsung, and also got huge attention from developers. There are countless Roms, and mods for this handset, and many other opportunities to improve its performance, and usability.
But sometimes installing third-party Roms, mods, and other apps lead to bricked phone. Most probably it happens after installing a new Rom. In that case, to revive it back to working state, installing a stock firmware would be the best one can do. It happened to my Galaxy Y many times, and most of time I had to use the stock firmware. If you’ve bricked your Samsung Galaxy Y then this guide is best suitable to you.
Lets repair the bricked Samsung Galaxy Y GT-S5360 using stock firmware. First, read all the pre-requisites listed below very carefully, and prepare the device accordingly.

Pre-requisites

  • These are official stock firmwares, developed, and distributed by Samsung only for Galaxy Y GT-S5360 device, and meant nothing for any other device. Don’t try’em on any other device, it could lead to very serious damage to the device.
  • As it is official firmware, so it would replace custom Rom, and custom modes to stock version, and it also removes the root access from the device. It simply turn to original state.
  • To perform this installation, you need a windows based PC with internet connectivity, and USB cable to connect your device to it. Windows XP, 7 or 8, any of these is recommended.
  • Install proper USB driver of you Samsung Galaxy Y device on PC, so it could be detected by PC correctly. To download the latest USB drivers for Galaxy Y, visithere.
  • Remember, the installing this Rom would remove everything from the internal memory of phone. That means, anything stored under the phone’s memory would be wiped out.

Downloads

→Get the stock firmware for your Galaxy Y on basis of you country from the below list:
→ After downloading the desire firmware zip file, extract it to safe place on your PC, and remember the location of it.
→Download the Odin Program from here (Odin 3.07.zip). Extract the zip file, and under it you’ll get a Odin3 v3.07.exe file. Remember it, we’ll be using it very soon.

How to install stock firmware on Samsung Galaxy Y

  1. Firstly, on PC run the Odin3 v3.07.exe file from the extracted Odin Program zip. A new window will appear on you screen.
  2. Now turn off you phone, and wait at least 5 seconds.
  3. Now press, and hold Volume Down + Home + Power buttons together until a Warning! message gets appeared on phone’s screen. Then press then Volume Up button to boot into the Download mode.
  4. Now connect the device to PC through USB Cable, and move on to Odin program. Once it detected the device successfully, the ID:COM section would get deflected, and Added! message will appear in message box. If nothing happens in you case, then you need to first install the USB Drivers of your phone first, and then try it again.
  5. Now on Odin program perform the followings:
    1. Select the PDA button, then find, and locate the PDA named file from the extracted firmware zip file.
    2. Select the Phone button, then find, and locate the Modem named file.
    3. Select the CSC button, then find, and locate the CSC named file.
  6. Make sure the Re-Partition box is unchecked, and don’t make any other changes.
  7. Now click on “Start” button to start the installation process. Once it done, a PASS! would appear on Odin program. And now you can remove your device from PC.
If you’re feeling uncomfortable with above tutorial then watch below video.

Video: How to flash stock firmware on Samsung Galaxy Y

[youtube:https://www.youtube.com/watch?v=8SGqQl321RE]
Your phone would be restarting it self, and will take you to home screen very soon. Then just fill up your Google account settings to get started with it. So this ends our guide to repair the bricked Samsung Galaxy Y. Moreover, visit our best causal games list to have fun with your device.

Wednesday, August 26, 2015

Flash firmware របស់ Samsung តាមរយៈ Odin លើ​ទូរស័ព្ទ(Mobile Odin)

ពិត​ជា​ពិសេសតែ​ម្តង​សំរាប់ អ្នក​ប្រើ​ប្រាស់​ទូរស័ព្ទ Android របស់​ក្រុមហ៊ុន​ Samsung។ កាល​ពី​មុន បើសិន​ជា ចង់​ដំលើង Stock ROM មក​វិញ​ចាំ​បាច់​ត្រូវ​តែ​ មាន​កុំព្យូទ័រ​ជំនួយ។ តែ​ពេល​នេះ ក្រុម xda-developer បាន​បង្កើត​កម្មវិធី Odin Mobile សំរាប់​ Flash Firmware ក្នុង​ទូរស័ព្ទ​ដៃ​តែម្តង (ស្រដៀង ClockWorkMode ដែរ)។

ចំពោះ​កម្មវិធីនេះ គឺ​មាន​២ប្រភេទគឺ មួយជាប្រភេទ lite និង​មួយ​ទៀត​ជា​ប្រភេទ Pro។ ចំពោះ​ប្រភេទ Lite គឺ​អាច​ទាញយក​បាន​
ប្រើប្រាស់​ដោយ​មិន​គិត​ប្រាក់។ តែចំពោះ Pro វិញមាន​តំលៃ​ ២.៦៨​ដុល្លារ(ផ្សារandroid)។ សំរាប់ lite គឺ​អាច​ទាញយក​បាន​ពី​ទីនេះ ដោយ​មិនគិតថ្លៃទេ។
លក្ខណៈពិសេស​នៅក្នុង Pro នោះគឺត្រង់វា​មាន​ EverRoot បន្ថែម​មក​ជាមួយស្រាប់។ EverRoot ជាមុខ​ងារ​មួយ​សំរាប់​ Root រាល់​ពេល​ដែល​ upgrade firmware។ បានន័យថា រាល់​ពេល​ដែល​អ្នក​តំលើង​ Firmware ថ្មី​តាម​រយៈ Odin Mobile នោះ​វា​នឹង​ Root ដោយ​ស្វ័យ​ប្រវិត្ត ហើយ​វា​នឹង​បញ្ជុល​កម្មវិធី​មួយ​ចំនួន​ដោយ​ខ្លួន​បាន​ទៀតផង។
ការប្រើ​ប្រាស់​កម្មវិធី​នេះ គឺ​វា មិន​រាប់​ចំនួន Flash Firmware នៅ​ក្នុង  ទូរស័ព្ទទេ។
ដោយ​សារ​តែ​វា​ជាកម្មវិធី​ថ្មី ដូច​នេះ​វា​មិន​ស្គាល់​បាន​ច្រើន​នោះ​ទេ តែ​យ៉ាង​ណា​វាក៏​អាច​ស្គាស់​បាន​ Samsung ល្បីៗមួយ​ចំនួន​ដូច​ជា៖
  • Samsung Galaxy S2 GT-I9100
  • Samsung Galaxy Note GT-N7000
  • Samsung Galaxy S GT-I9000
  • Samsung Galaxy Tab 7″ GT-P1000
ជាមួយ​គ្នា​នោះ​ផង​ដែរ មានទូរស័ព្ទ​មួយ​ចំនួន​ធំ​ទៀត​ដែល​នឹង​រៀប​ចំ​ឲ្យ​មាន​នោះគឺ៖
  • Galaxy Mini GT-S5570
  • Google Nexus S GT-I9023
  • T-Mobile Virant SGH-T959
  • Galaxy Ace GT-S5830
  • Galaxy S GT-I9000M
  • Galaxy Y GT-S5360
  • Samsung Apollo
  • Galaxy Note GT-N9220
បញ្ចាក់៖ មុននឹងប្រើ Odin Mobile ចាំបាច់​ត្រូវ​តែ​ Root ជាមុន។ សូមទទួលខុសត្រុវ​ដោយ​ខ្លួនឯង។

ទាញយក​កំណែ Android 4.4.4 សម្រាប់ Galaxy SIII (SHV-E210L/S/K)

Korean-Galaxy-S3-jelly-bean-update
បន្ទាប់ពី​ពត៌មាន​លើក​ដែល Samsung ប្រកាស​អំពី​ Android Kitkat 4.4.4 នៅ​លើ Galaxy S3 នោះ​ ពេលនេះ​យើង​អាច​ទាញវា​យក​មក​សាកល្បង​បាន​ហើយ។
កំណែ​ថ្មី​នេះ​​បាន​កែប្រែ​នូវ​កំហុស​ដែល​មាននៅ​ជំនាន់​មុនៗ និង​អ្វី ដែល​សំខាន់​នោះ​ គឺវា​ជា Android ជំនាន់​ចុង​ក្រោយបំផុត។ តែ​វា​មានតែ​សម្រាប់ម៉ូដែល​របស់កូរ៉េ​គឺ SHV-E210L/S/Kតែ​តែ​ប៉ុណ្ណោះ ដោយ​សារ​តែ វា​មានទំហំ RAM ដល់ទៅ 2GB ដែល Samsung អះអាង​ថា​អាច​ប្រើបាន​ដោយ​គ្មាន​បញ្ហា។ លោក​អ្នក​អាច​ទាញយក​តាមរយៈតំណ​ខាងក្រោម​នេះបាន៖

M190S Firmware (WD19)

Stock firmware M190S។ បើចង់បង្រួម​សូមប្រើ HJSplit

Tuesday, August 25, 2015

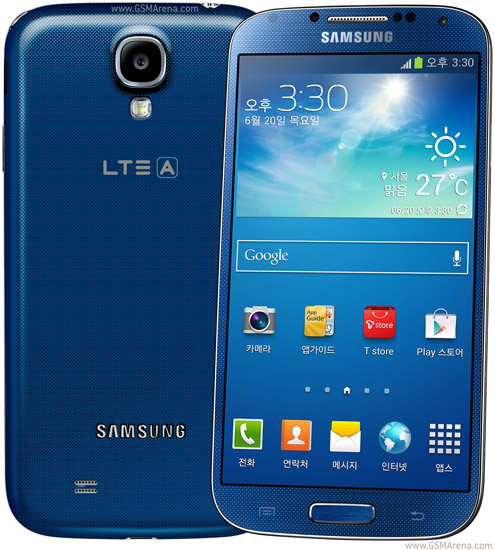
[Stock Firmware] Samsung Galaxy S4 LTE-A E330S (Jelly Bean 4.2.2)


http://cdn2.gsmarena.com/vv/pics/samsung/samsung-shv-e330s-galaxy-s4-lte-a.jpg


សូមទាញយក

ម៉ឺនុយខ្មែរលើ Galaxy ACE 2 I8160

ម៉ឺនុយខ្មែរលើ Galaxy ACE 2 I8160

 ( Restore by Custom Recovery ) (for V4.1.2)
up+power+home-->apply update from external sd card-->update.zip-->backup and restore-->restore then reboot system now.
1.Custom recovery​(​update.zip) :  ទាញយក
2. Menu Khmer ( ClockWordMode ) : ទាញយក
សូមធ្វើដោយទទូលខុសត្រូវខ្លួនឯង.... សូមអរគុណ!!!

វិធី​តម្លើង​ខ្មែរ​យូនីកូដ​លើ Galaxy Note 10.1 (GT-N8000)


នៅជំនាន់​ថ្មីៗ​ចុង​ក្រោយ​របស់ Samsung បាន​បង្កលក្ខណៈ​ងាយ​ក្នុង​ការ​តម្លើង​ពុម្ពអក្សរ​យូនីកូដ​ ដោយ​មិន​ចាំ់​បាច់ root។ យើង​ក៏សូម​ថ្លែង​អំណរគុណដល់លោក​ ដាញ់ ហុង ដែល ​បាន​បង្កើត​នូវ​ពុម្ព​អក្សរ និង​កម្មវិធី  Khmer.apk ដែល​សំរាប់​ប្រើ​ប្រាស់​តម្លើង​ដាក់​ទូរស័ព្ទ Samsung និង Android ផ្សេងៗ​ទៀត​ដែល​ប្រើប្រាស់​ flipfont។
ជំហ៊ាន​ខាងក្រោម​គឺជា​វិធី​ដែលប្រើ​សំរាប់​តម្លើង​ពុម្ពអក្សរ​ខ្មែរ​យូនីកូដ​ដាក់​លើ Galaxy S advance៖
  1.  បន្ទាន់​សម័យ​ទៅ Jelly Bean 4.1.2
    • លោក​អ្នក​ត្រូវ​តែ​ upgrade ទូរស័ព្ទ​របស់លោក​អ្នក​ទៅ​កាន់ Android 4.1.2 តាម​វិធី​ខាងក្រោម៖
      •  ពន្លាវាទុកមួយឡែក
      • ទាញយក Odin
      • តម្លើងdriver (បើសិនជាមិនទាន់មាន)
      • បិទទូរស័ព្ទ
    • បើកវិញដោយចុចVol Down + Home + Power
    • បន្ទាប់មកវានឹងចេញការបញ្ជាក់បន្ថែម (សូមចុចVol up)
    • ជាបន្តវានឹងចេញពាក្យថាdownloading…
    • ភ្ជាប់វាទៅនឹងកុំព្យូទ័រ
      • បើកកម្មវិធី odin
      • បើសិនស្គាល់នោះវានឹងចេញនូវពណ៌លឿងក្នុង textbox ព្រមជាមួយនឹងលេខ port
      • ចុចប៊ូតុង PDA
      • ជ្រើសយកfirmware ដែលបានពន្លានៅក្នុងជំហ៊ានទី៣
      • ចុចប៊ូតុង start
      • រងចាំមួយសំទុះ នោះវានឹងតម្លើងដោយខ្លួនឯង
  2. បន្ទាប់​ពី​តម្លើង ទៅកាន់ Jelly Bean ហើយ​សូម​ទាញយក Khmer.apk
  3. តម្លើង Khmer.apk តាម​ធម្មតា (ចំលងចូល sdcard ហើយ​តម្លើង)
  4. ចូល​ទៅកាន់ Settings => Display => font style => Khmer
លោក​អ្នក​អាច​មើល​និង​សរសេរ​ខ្មែរ​បាន​ហើយ​(សូមបញ្ជាក់​ផង​ដែរ​ថា​វា​នឹង​មិន​អាច​ប្រើ​បាន​នៅលើ Browser របស់​ Samsung បាន​ទេ។ ដូច​នេះ​បើ​ចង់​មើល​គឺ​ត្រូវ​តែ​ root។)

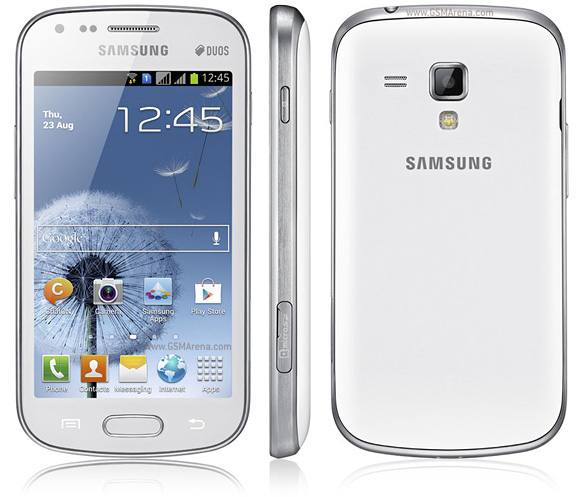
How to Root Samsung Galaxy S Duos S7562 and install khmer


  • Download the Samsung Galaxy S Rooting Kit zip file  and extract to some folder, you should receive a tar file.
  • Open odin 3 Which is extracted form the root kit and put the tar file in pda.
  • Put the device into download mode. (vol down + home + power button, and then click on vol up)
  • Connect phone to usb and wait for odin detect the device.
  • Click start.
  • Let Odin complete The Following Process, don't interrupt the process.The green bar tell you the Progress of the operation.When the green box in Odin Windows shows "pass" your phone will start a Reboot.
  • After it when the Phone starts,Copy CWM Superuser v 3.1.3.zip in your internal or external sd card and then Again switch off the Phone.
  • Go to CWM recovery by pressing Vol up+Vol Down+Home+Power Button simultaneously.
  • Then select install zip from sd card and then choose  CWM Superuser v 3.1.3.zip And install it.
  • Then Reboot System Now...Now enjoy the power of super user in your Phone.
  • Go to CWM recovery by pressing Vol up+Vol Down+Home+Power Button-->install zip-->Unicode and play store-->yes-->reboot.
Filed Download 
Download Rooting 
Download Khmer Font 100%(128.94Mb)
Download firmware Galaxy S duos

របៀបដំឡើងជំនាន់Galaxy SII korea M250s/k/L ទៅកាន់International I9100 Official JB and Full Khmer Unicode


I-ឯកសារដែលត្រូវមាន
1- Odin Download
         2- Firmware 
          Part1     Download 
          Part2     Download 
          Part3     Download
          Part4     Download 
       3- Root Explorer  Download 
       4- Font unicode   Download 
II - របៀបអនុវត្ត
1- Open odin
- Pit > emmc_EXT4_16GB.pit
- PDA > CODE_I9100XXLSJ.tar
- Phone > MODEM_I9100XXLS6
- CSC > CSC_HOME_OXX_I9100OXXLS1
2- Boot to Download mod and connect to PC (see yellow usb port)
3- Click Start to run (Pass) Reboot Phone
4- Root and CWM
- Open Odin > PDA > Find Root File(3)
- Boot to Download mod and connect to PC (see yellow usb port)
- Click Start to run (Pass) Reboot Phone
5- Intsall Khmer unicode
- Copy Font khmer uniocde (4) To Phone
- Boot To CWM and Flash Font khmer unicode
- Reboot Finish 
 បញ្ចាក់   ៖  បើសិនជាមានបញ្ហាណាមួយខ្ញុំបាទមិនទទួលខុសត្រូវឡើយ

Friday, August 21, 2015

How to flash Stock ROM via ODIN on Samsung Galaxy S3

Before starting flash stock ROM via ODIN on Samsung Galaxy S3, the things youshould take care of are:
1. Back up all the important data of your phone such as messages, contacts, etc.
2. Make sure that your Samsung Galaxy S3 is charged fully or above 80%.
3. Download ODIN and then install it on your PC
4. Download 7Zip or winrar
ODIN is a program that can use the MD5 file to install ROMs on your device. This MD5file can be anything such as modems, recoveries or even ROMs. Before you start withthe process of flash stock ROM via ODIN on Samsung Galaxy S3update yourdevice drivers. It can be done in two ways, either you can search over the internet foryour updated drivers and then download and install it on your PC. The other way isdownloading or updating Kies. Then install or update drivers. After installing thedrivers, restart your PC.
Process to flash stock ROM via ODIN on SamsungGalaxy S3
Step6

1. Install ODIN and open it. Where you see the PDA button, browse to the MD5 fileyou downloaded; it should have a .tar extension.
2. Disconnect your device from your PC
3. Put your galaxy s3 in download mode, hold (Volume down + Home + Power), thenpress volume up
4. Connect your galaxy S3 into to your PC and wait for Odin to recognize it
root-your-samsung-galaxy-s3-and-flash-stock-roms-using-odin-for-windows.w654
5. A message will be at the bottom “ADDED” when Odin recognized your device: Donot check Re-Partition
6. After few minutes, a colored box will appear. ‘COM: 3’. It means your PC hasdetected the device, and everything is ready to flash stock ROM via ODIN onSamsung Galaxy S3.
7. Click Start
Odin-PASS-Box
After ODIN is done; a box will appear where is written reset or passed. At this point,you can unplug your phone.
Note: This method is applicable for Galaxy S3 AT&T,Verizon,US,Cellular,T-Mobile,Sprint,Metro,Cricket,LTE