Showing posts with label SONY. Show all posts

Thursday, August 27, 2015

How to flash Xperia Z2/Z3 Lollipop 23.1.A.0.690 ftf using Flashtool Manually

Now we will use Flashtool to flash manually firmware ftf.
Facts to know:
  • Flashing firmware ftf file on your Xperia device doesn’t void warranty.
  • Flashing ftf file doesn’t require unlocking bootloader of your Xperia device.
  • No root needed.
Pre-requisites:
  • Xperia device.
  • USB cable.
  • PC.
  • Firmware ftf file.
You should do?
  • Take a backup of all your data via PC Companion.
NOTE: We will explain the tutorial taking Xperia Z2 and flashing 23.1.A.0.690 ftf on it. Steps are similar for every Xperia handset on any firmware.
Step 1 – Download Flashtool
Download Flashtool version 0.9.18.5 (or the latest available) from here.
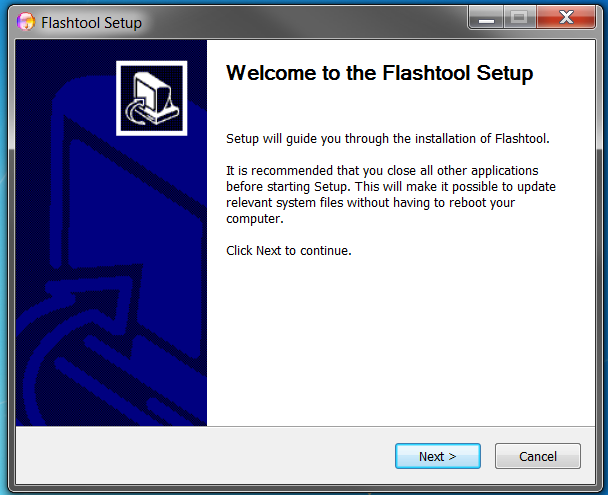
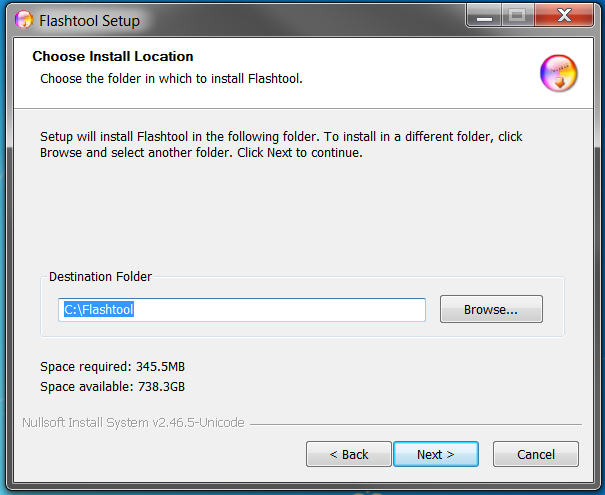
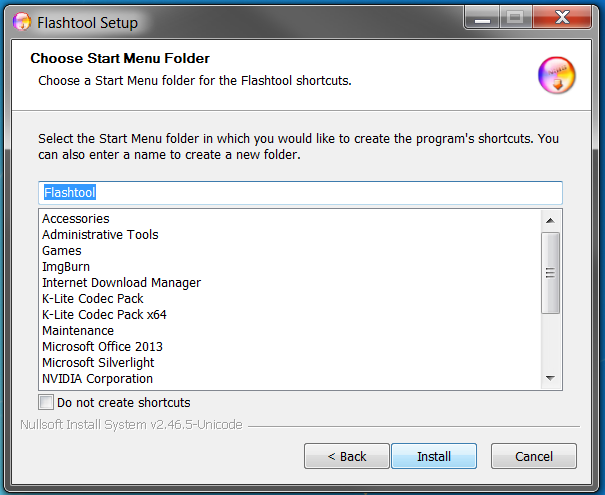
After downloading above Flashtool, install it.
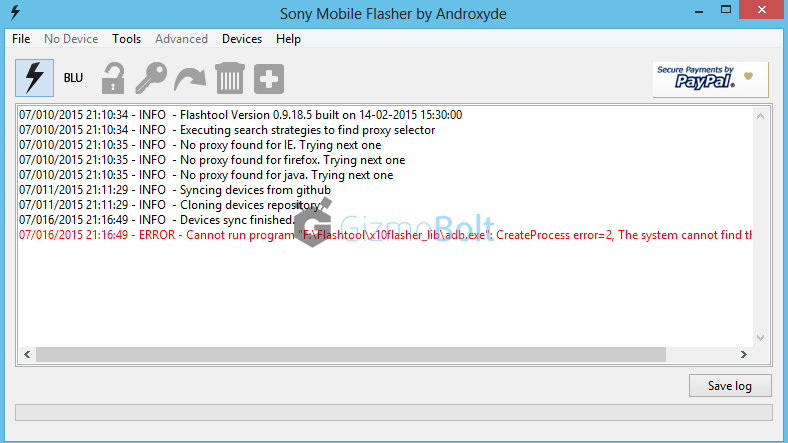
On opening it, it may ask you to move files stored in F:\Flashtool\firmwares toF:\Users\PC NAME\.flashTool\firmware (Do move the ftf stored if asked to do so).
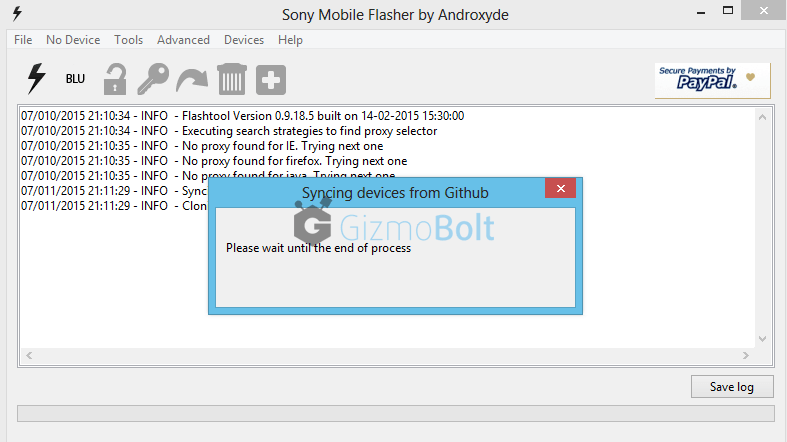
Wait then till it syncs the devices list (if it don’t syncs because you are not connected to internet, then leave it. It is not mandatory to do sync).
Create ftf via FlashTool
How to use Xperia Flashtool to update Lollipop
Step 2 – Download Firmware Ftf file
For D6502 INDIA region
Step 3 – Put your above download firmware ftf in “F:\Users\PC NAME\.flashTool\firmware” folder
Additional Step :- Install Drivers
Install Drivers from the folder named “Flashtool Drivers” in the location where Flashtool is installed OR just install PC Companion on your PC and connect your device with it and then remove it.
Step 4 – Open FlashTool
Now Open Flashtool. See the “Black Lightning Thunder icon” at the top left corner. Click on it.
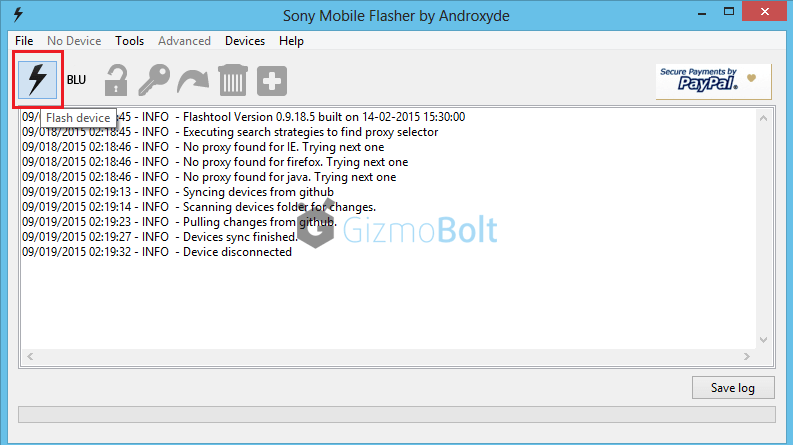
How to flash Xperia Z2 Lollipop firmware
Step 5 – Choose Flashmode from Bootmode chooser
Now choose flashmode from given two options.
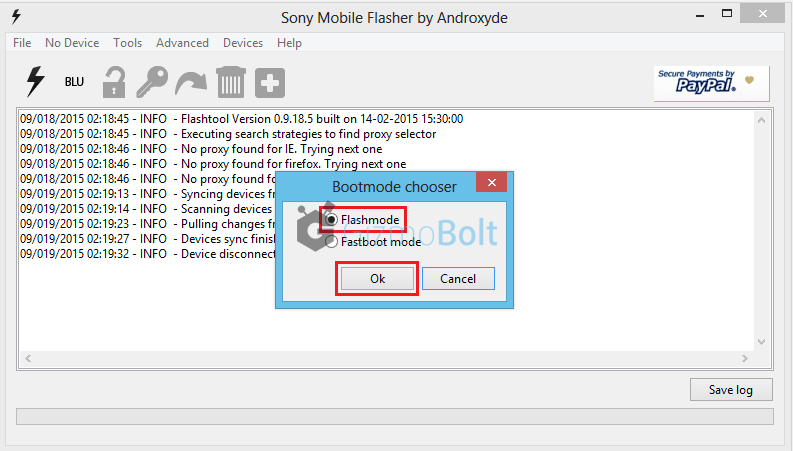
Xperia Z2 Lollipop firmware flashing manually
Step 6 – You will now automatically see your download firmware ftf file in the “firmware” section (left hand side) of Flashtool window. Select your firmware.
Step 7 – Wipe data if you wish
See the right hand side of window under the “Wipe” tag, all three options are checked if, will delete all user data.
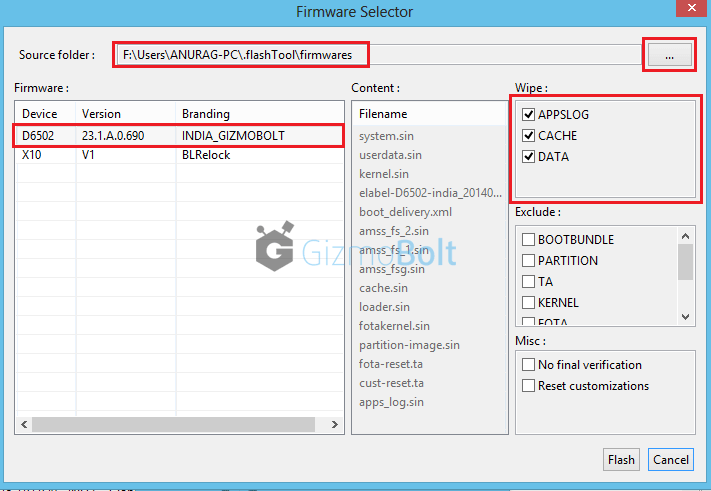
How to flash 23.1.A.0.690 firmware on Xperia Z2 using Flashtool
So if you don’t want to delete all user user data and don’t want a factory reset then you should uncheck them.
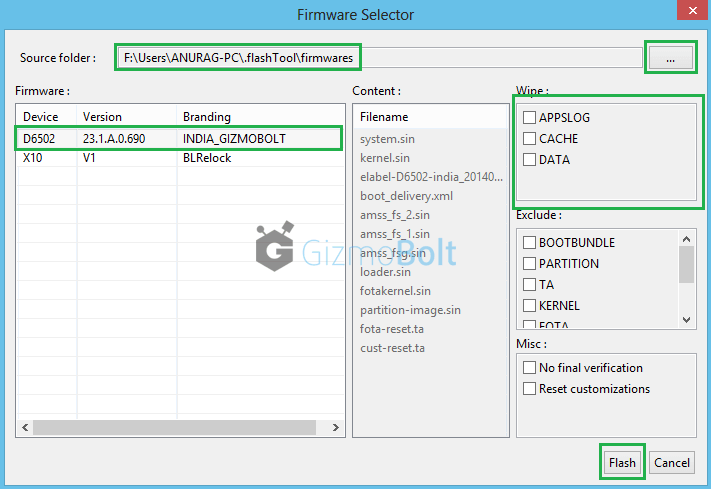
Flash Lollipop 23.1.A.0.690 ftf on Xperia Z2
Wiping full data is recommended, though (if you have backup).
Do it: Click on “Flash” button.
Step 8 – Preparing files for flashing
After clicking on “Flash” Button in above step, now FlashTool will prepare firmware ftf selected for flashing.
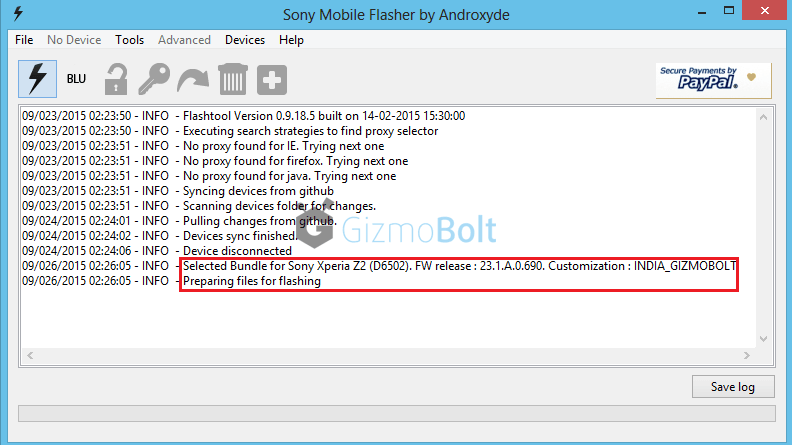
How to update Xperia Z2 on Android Lollipop
Step 9 – Connecting phone in FlashMode.
Important: Now enable USB Debugging on your phone and enable unknown sources option in your Xperia device and switch it off.
When prompted the notification of connecting your phone, connect it in flashmode (as chosen above)
How to do ? Press Volume down button and then insert usb in phone, you will see red and green light blink once, it means phone is connected in flashmode now.
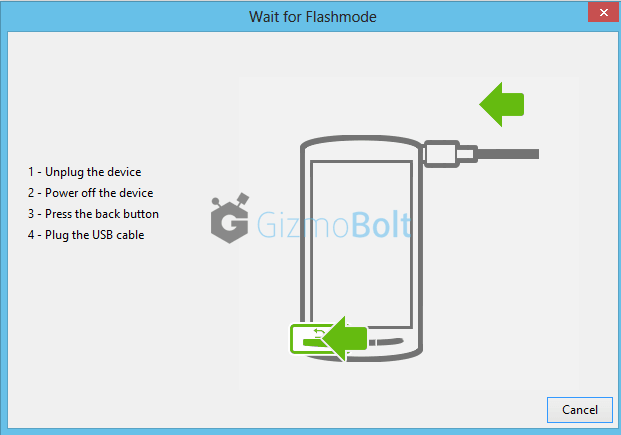
How to connect Xperia Z2 in flashmode
As soon as phone is detected by Flashtool, flashing beings and wait till it is finished.
WARNING: Do not cancel the process in between once flashing has started or it will result in boot loop or device not booting up at all.
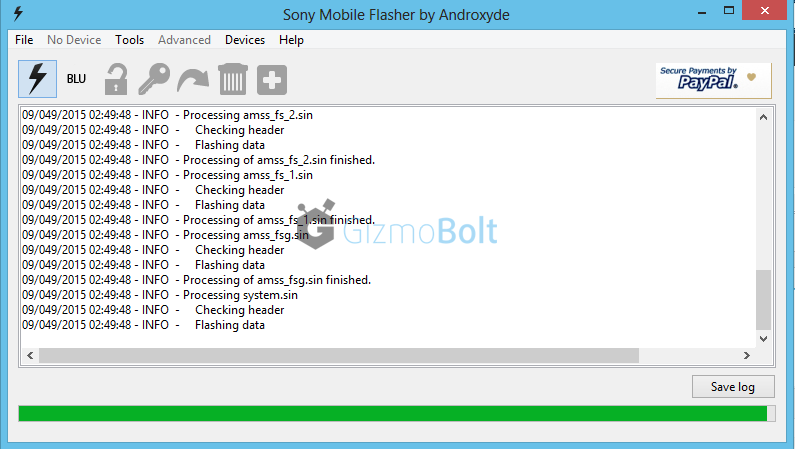
Update Xperia Z2 on 23.1.A.0.690 using Flashtool
Disconnect phone as soon as flashing is finished.
Step – 10 Disconnect phone
Now reboot your phone. First reboot after the update will take some time.
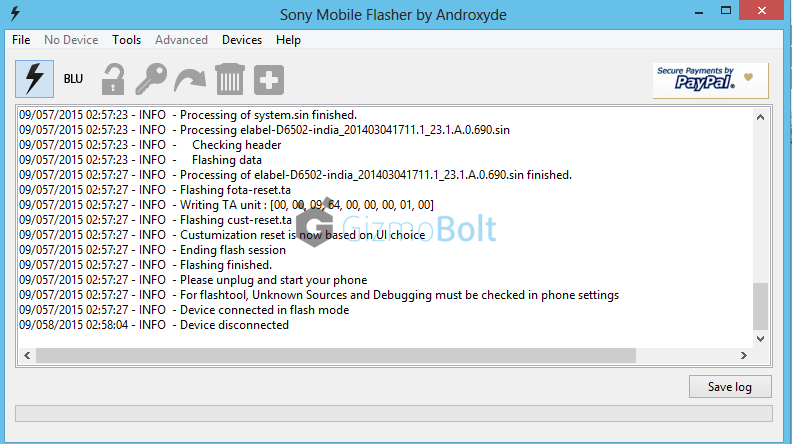
Flash 23.1.A.0.690 ftf on Xperia Z2
You must have Android 5.0.2 Lollipop 23.1.A.0.690 firmware installed on your Xperia Z2 now.
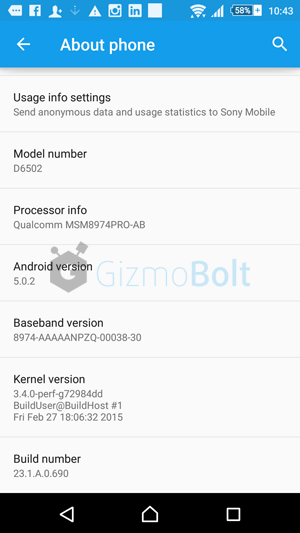
Xperia Z2 Lollipop update INDIA

HOW TO FLASH STOCK FIRMWARE (.FTF/ROM) ON YOUR XPERIA Z


1: First of all you need to make sure you download the LATEST Flashtool from here http://forum.xda-developers.com/show....php?t=2162907
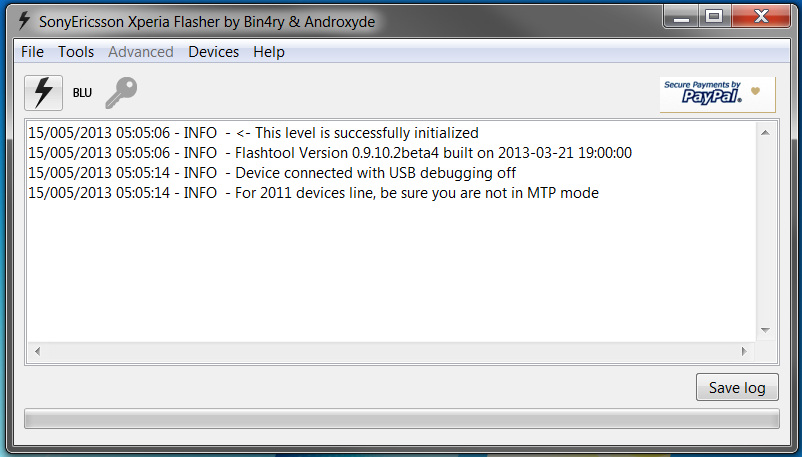
If it is your first time for your phone on the PC, install the flashmode driver, and then get the HW detection to work. Eg, install the driver, then turn off your phone, and then hold down the Down volume button and plug it in – windows will then go into hw detection and install the driver for the phone. It will try to check online, so skip that, and it will install the proper driver you just locally installed.
Thanks to Mobe1969 from the Whirlpool forum
NOTEBeen seeing people having problems flashing stock .253 based ROMs. Thanks to gm007 for suggesting to use the beta4 version of FlashTool if flashing stock .253 ROMs. You can download beta4 version from here http://goo.im/devs/jerdog/sony

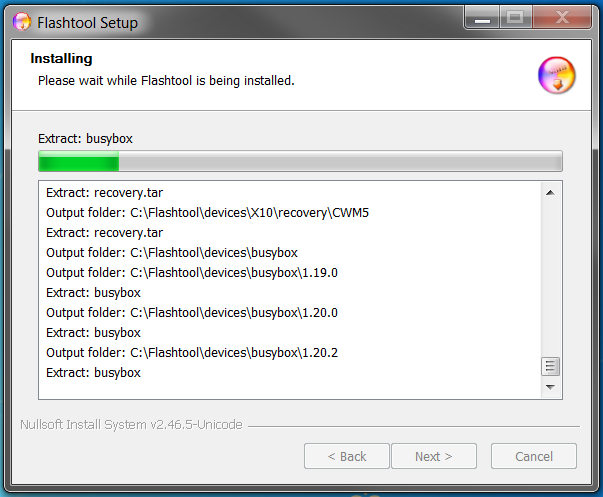
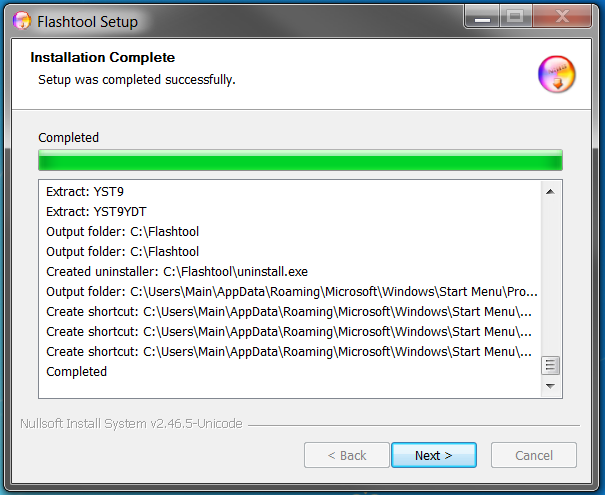
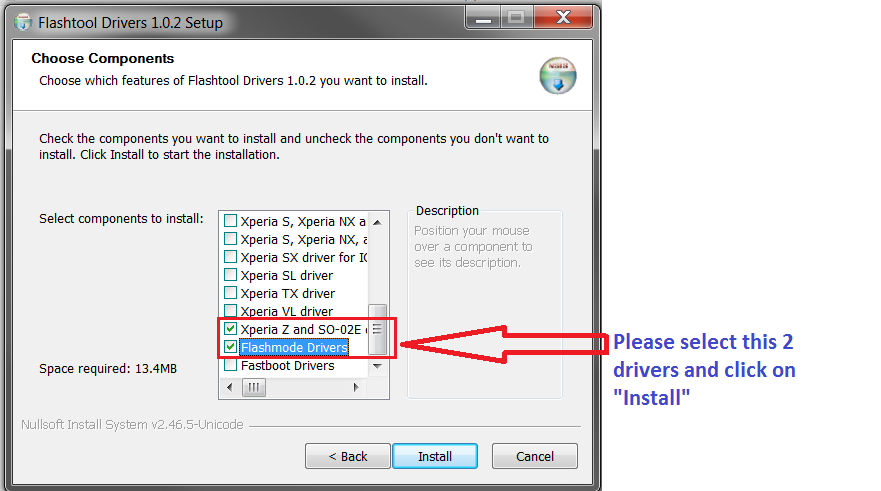
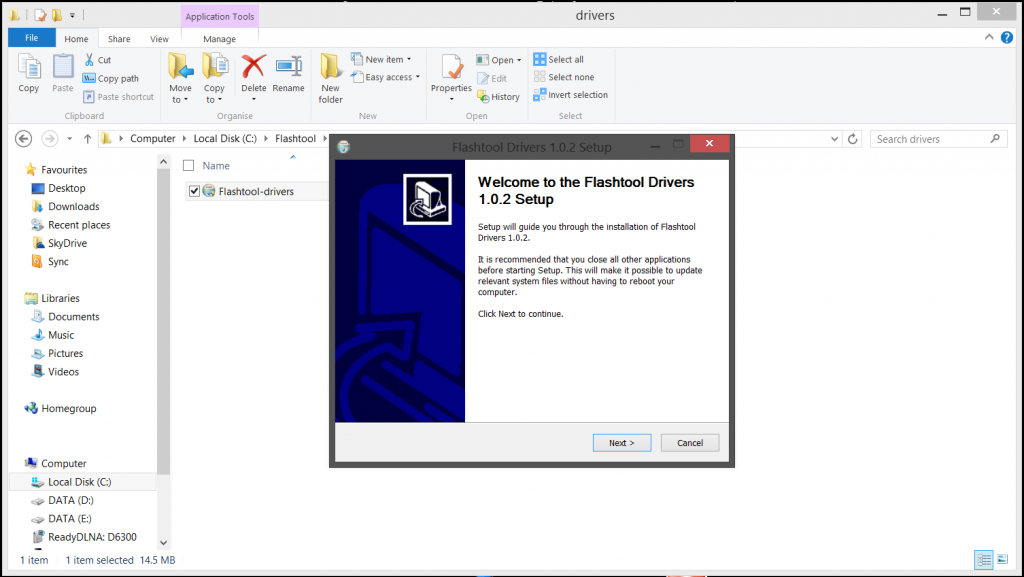
Install Flashtool and install the drivers for the XZ Please see picture below:


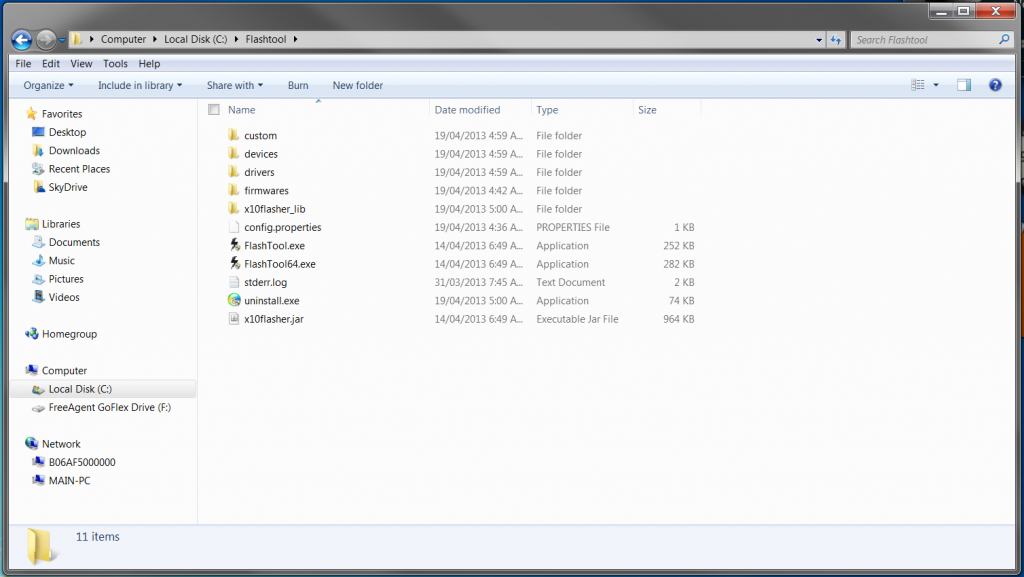
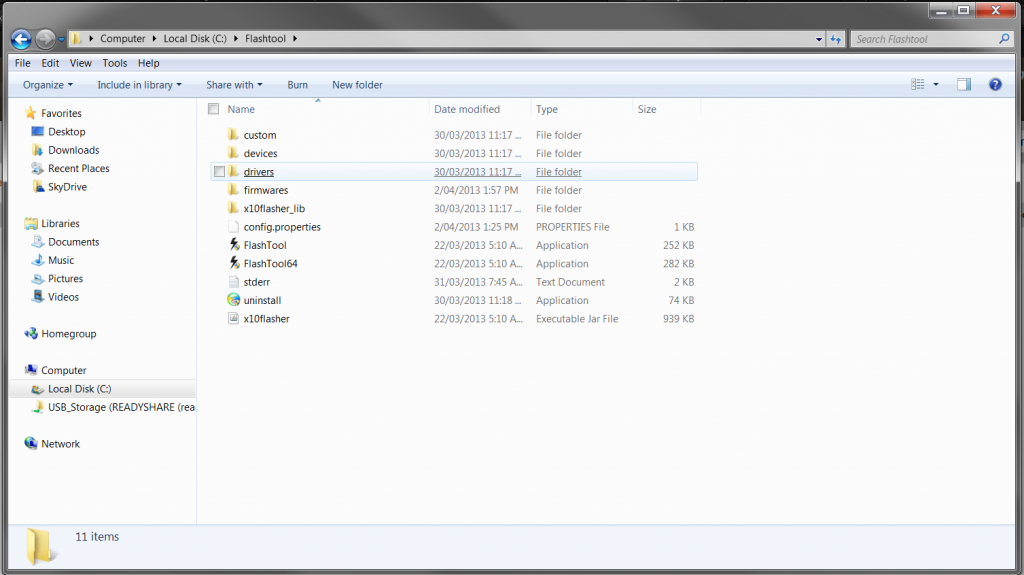
2: Once installation is complete, navigate to the folder where FlashTool is installed as shown in the picture below


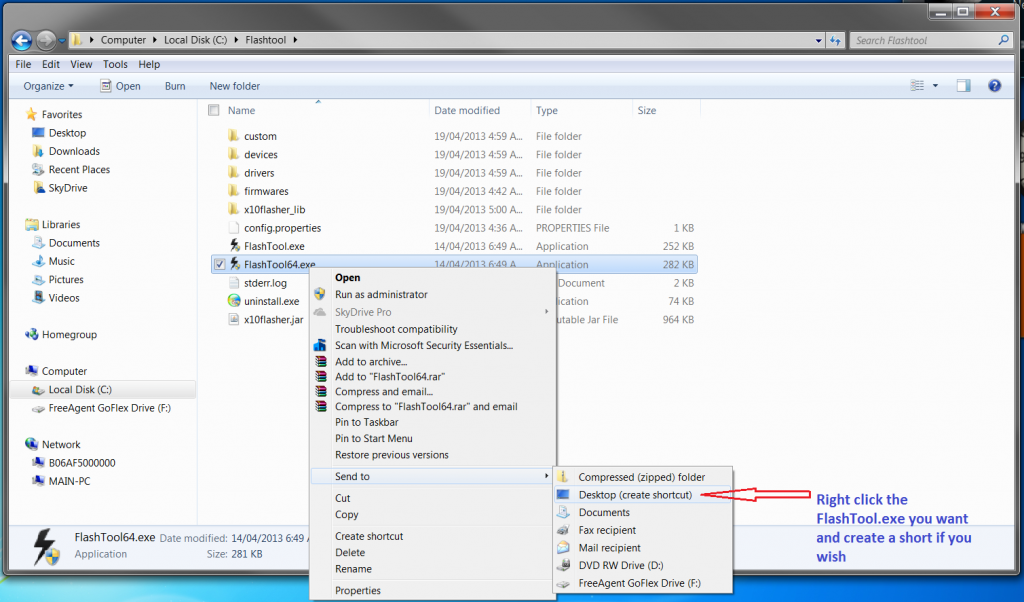
2a: This is optional if you want to create a shortcut to the desktop


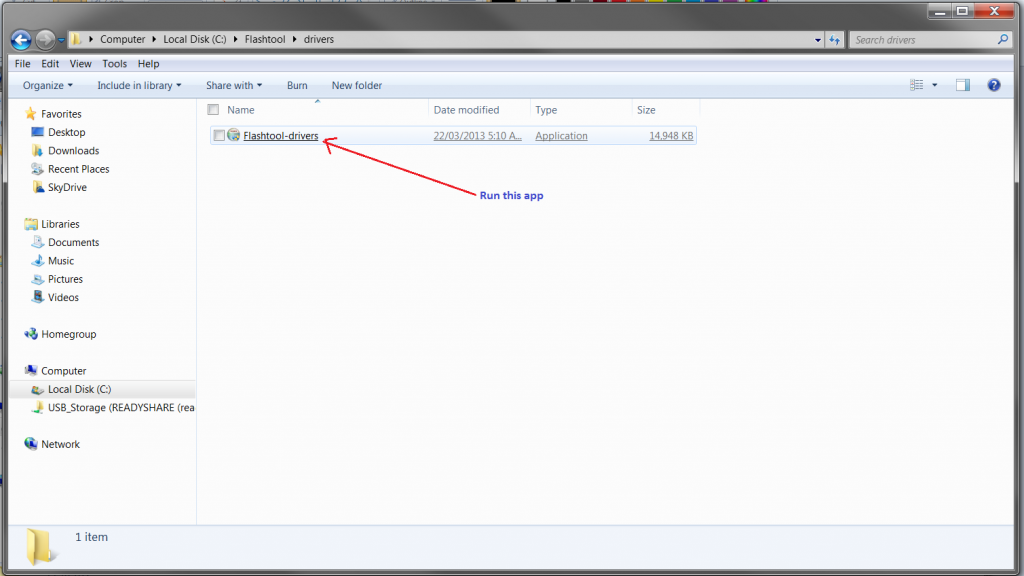
3: Now install the driver for the Xperia Z. The driver installer can be found in the FlashTool folder See pictures below:


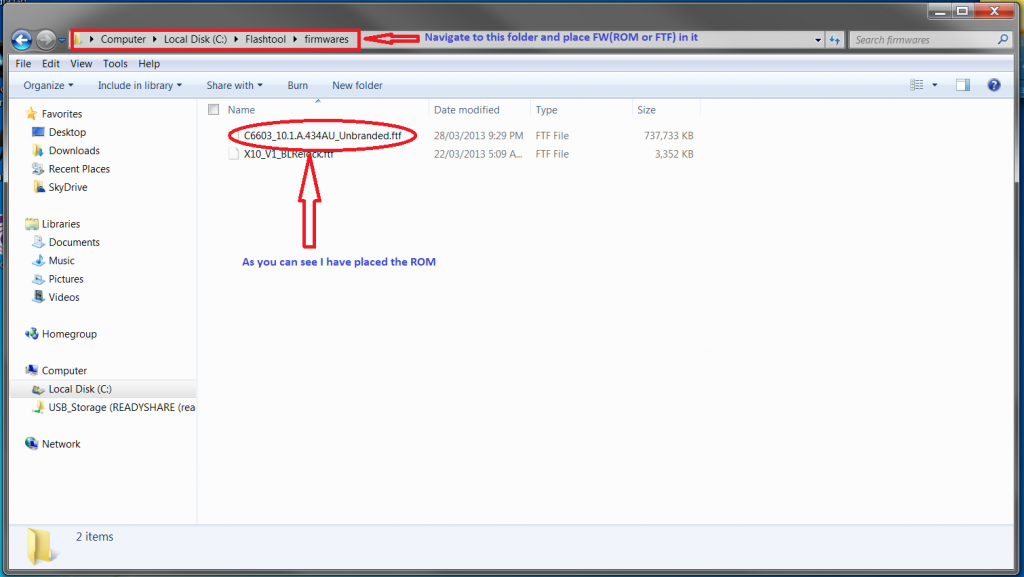
4: Now for Flashing your Xperia Z. You will need to download the STOCK .ftf (firmware/ROM) and place it in the firmware folder located in the flashtool folder


Here are a list of UNBRANDED .434 ROMs I could find:
UNBRANDED STOCK .434 ROMs
Australia Stock .434 http://forum.xda-developers.com/show....php?t=2209281
German Stock .434 http://forum.xda-developers.com/show....php?t=2216743
Greek Stock .434 http://forum.xda-developers.com/show....php?t=2275794
Hong Kong Stock .434 http://forum.xda-developers.com/show....php?t=2201801
India Stock .434 http://forum.xda-developers.com/show....php?t=2212694
Netherlands Stock .434 http://forum.xda-developers.com/show....php?t=2200945
Singapore Stock .434 http://forum.xda-developers.com/show....php?t=2233312
UK Stock .434 http://forum.xda-developers.com/show....php?t=2221475

Here's a list of UNBRANDED .253 ROMs I could find:
Australia Stock .253 http://forum.xda-developers.com/show....php?t=2280329
Global Stock .253 http://forum.xda-developers.com/show....php?t=2283170
India Stock .253 http://forum.xda-developers.com/show....php?t=2278993
Netherlands Stock .253 http://forum.xda-developers.com/show....php?t=2200945
Sweden Stock .253 http://forum.xda-developers.com/show....php?t=2282728


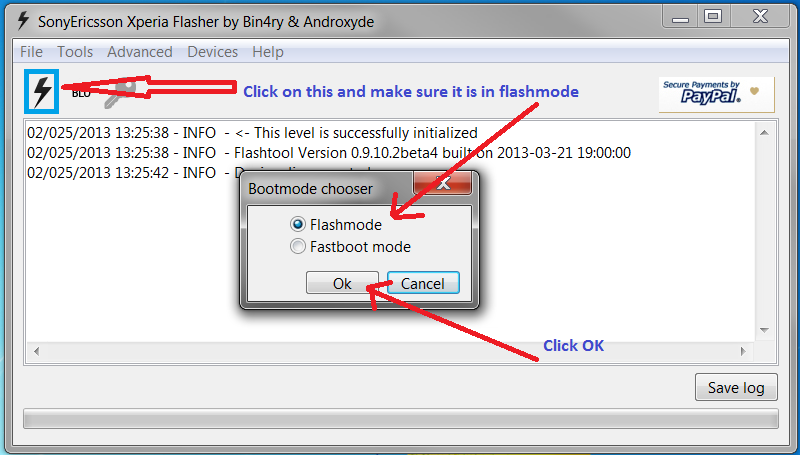
5: Now for flashing. Run the FlashTool app. Make sure that it's in "Flashmode" and click "Ok"


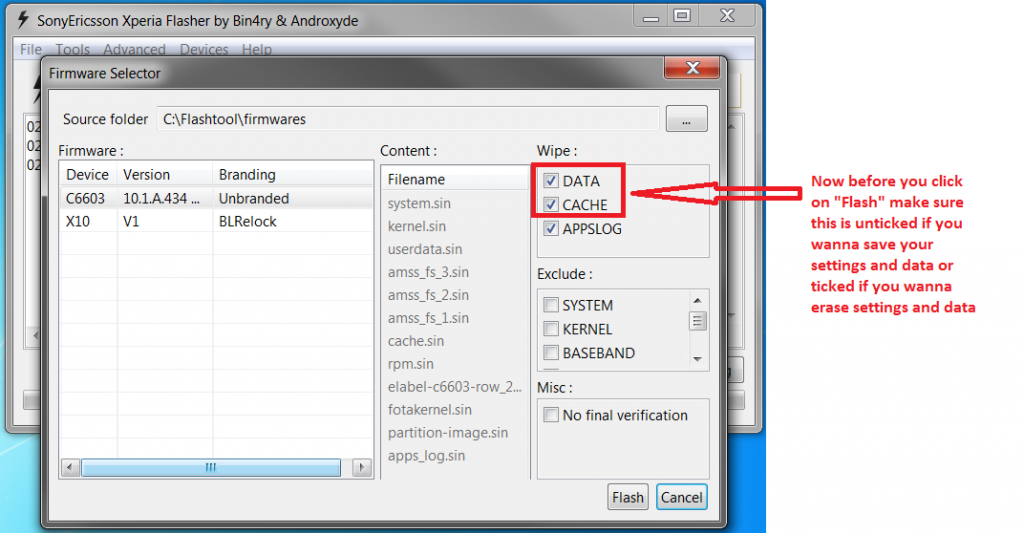
6: This window should show up. Please select the ROM you are gonna flash. And follow the prompts


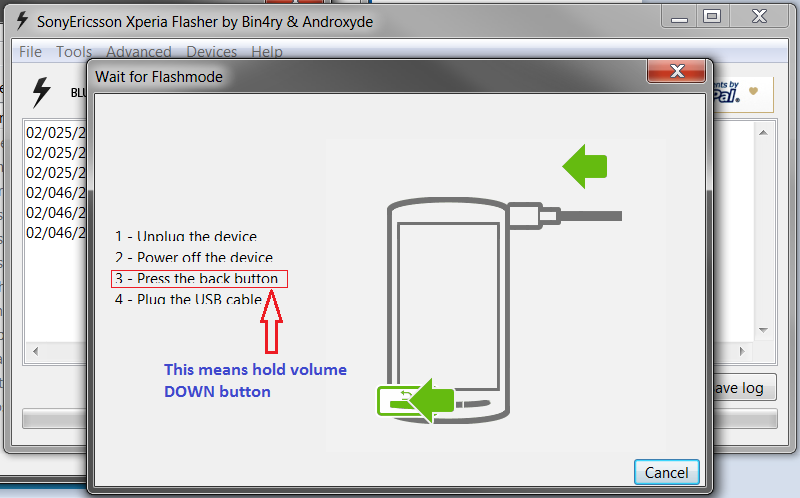
**NOTE** Please FOLLOW the prompts! The picture below says:
1:Unplug your device from your PC
2:Power OFF the device (Turn your phone OFF)
3:Hold down the VOLUME DOWN button
4:While holding the VOLUME DOWN button plug your phone back to your PC


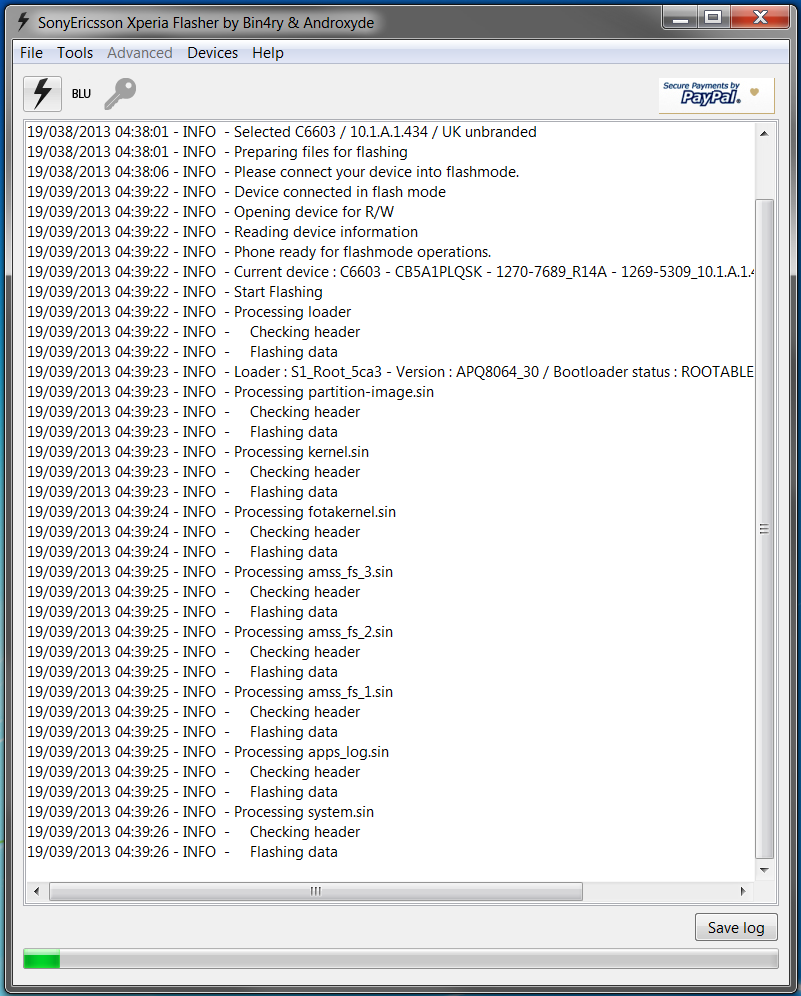
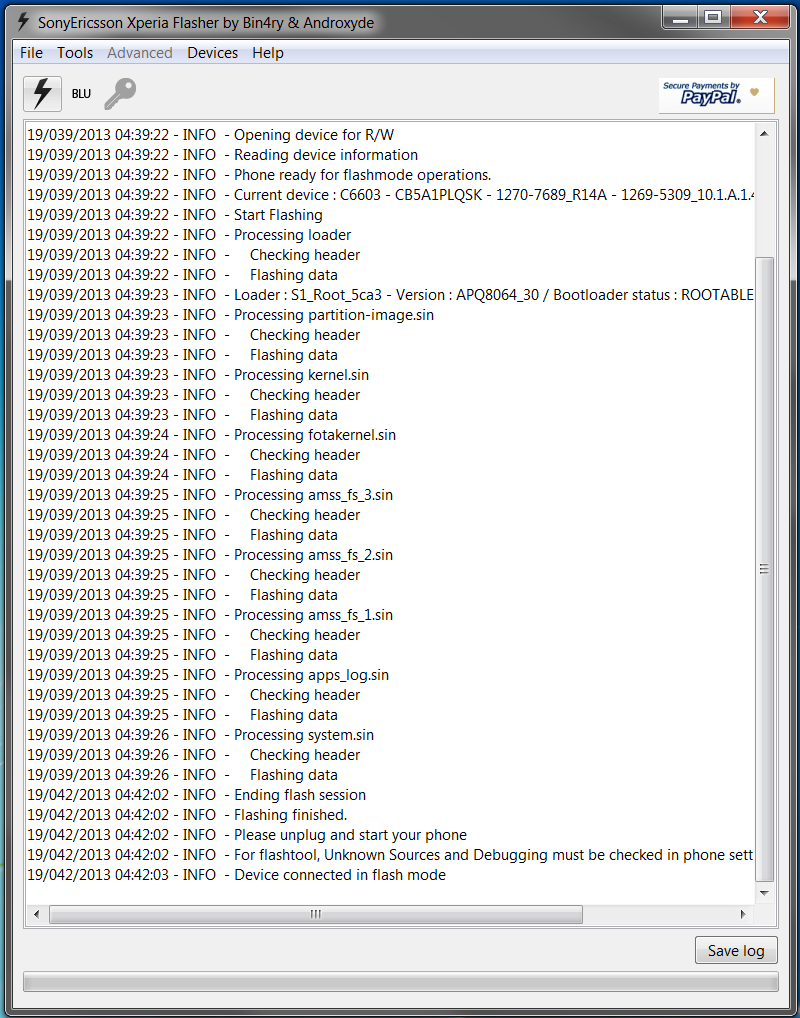
The process should look like this. Please wait until it is finished See pictures below:


And that is it, you are all done. Power up your Xperia Z and enjoy your new stock ROM

PART 2: Driver installation in Windows 8

Okay since people are having trouble installing drivers for the Xperia Z in Windows 8. I made a tutorial on how to install the Xperia Z driver using the FlashTool in Windows 8.

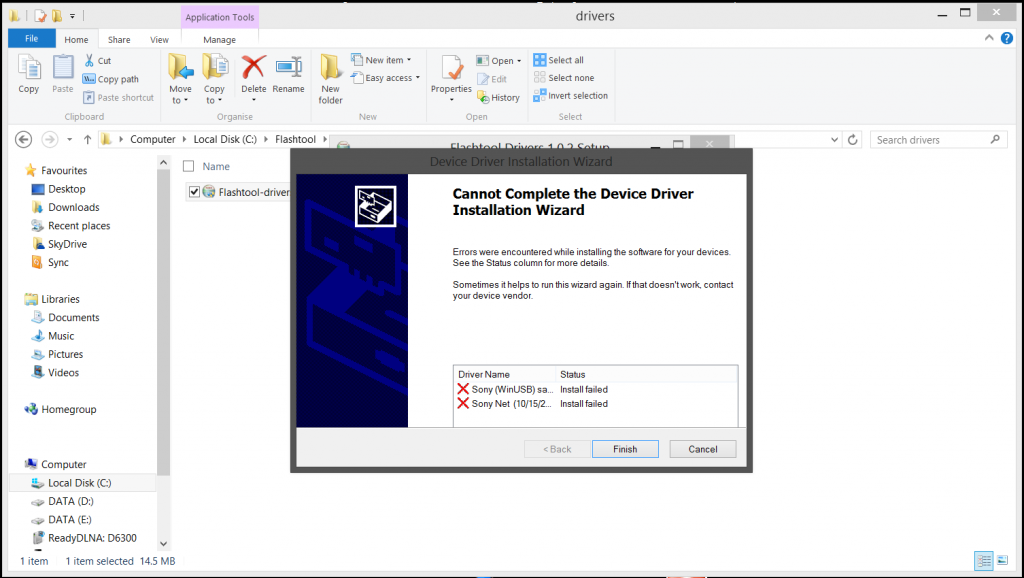
As shown in the picture below when you try to install the drivers for the Xperia Z in Windows 8 for the first time this is what happens:


As you can see the drivers didn't install:


So here are the steps to install the drivers:

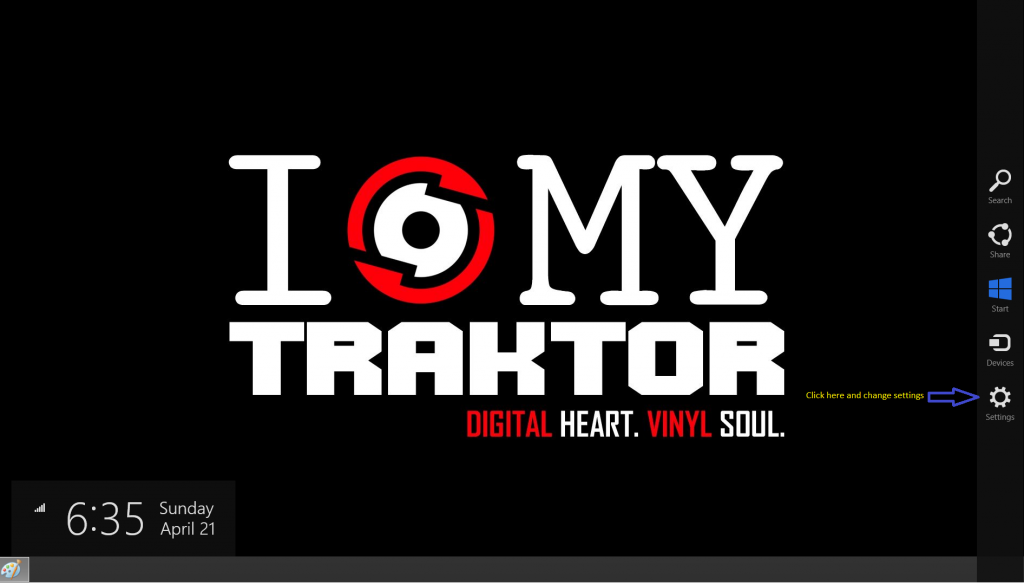
Step 1: Go to "Settings" (if you don't know how to do this, place your mouse pointer in the upper right corner or bottom right corner of your screen and the sidebar should pop out as shown in the picture below):


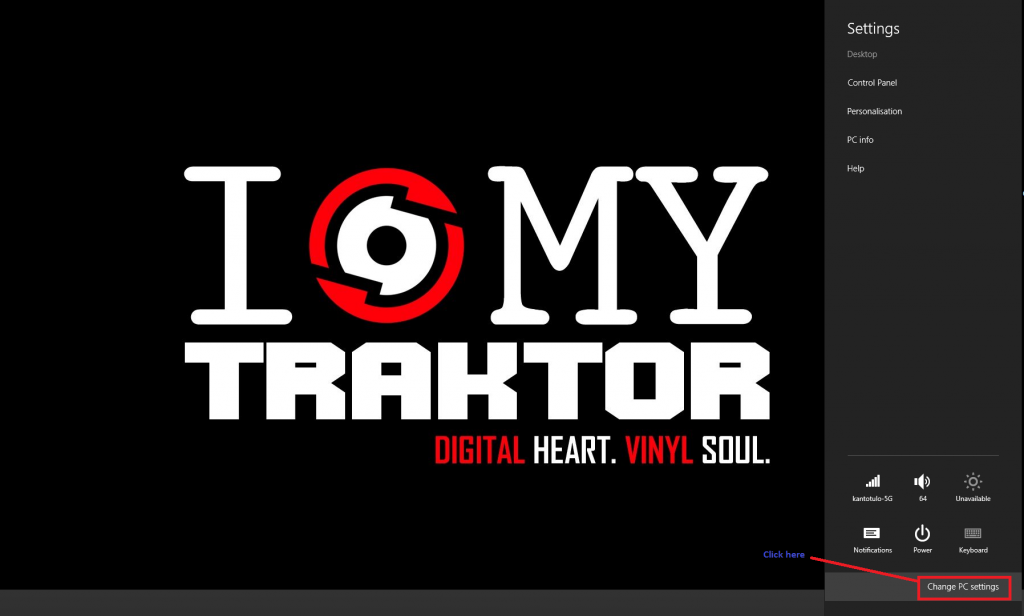
Step 2: Click on "Change PC settings" as shown in the picture below:


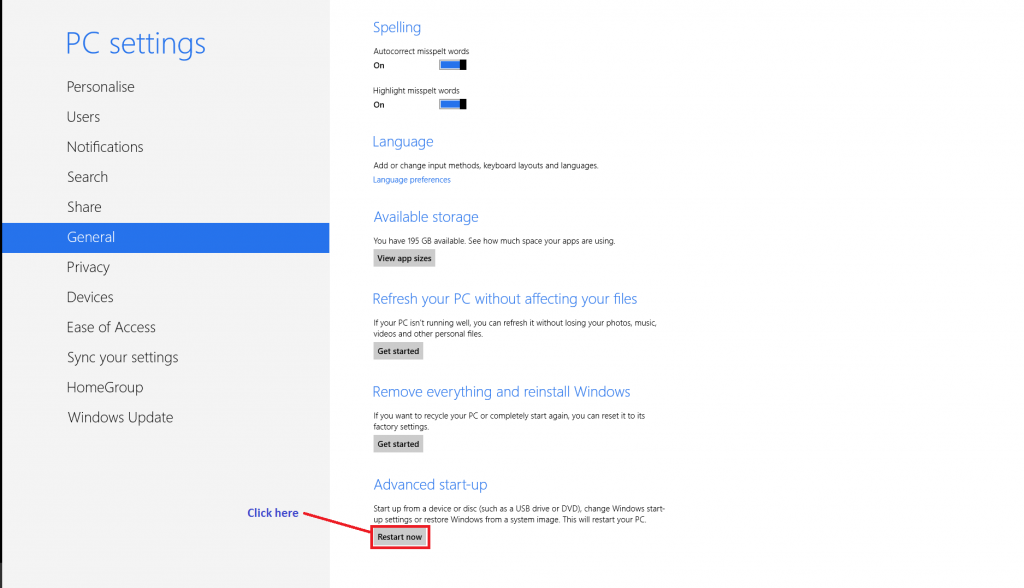
Step 3: When you get to this screen, scroll down to "Advanced start-up" and click the "Restart now" tab. See picture below:


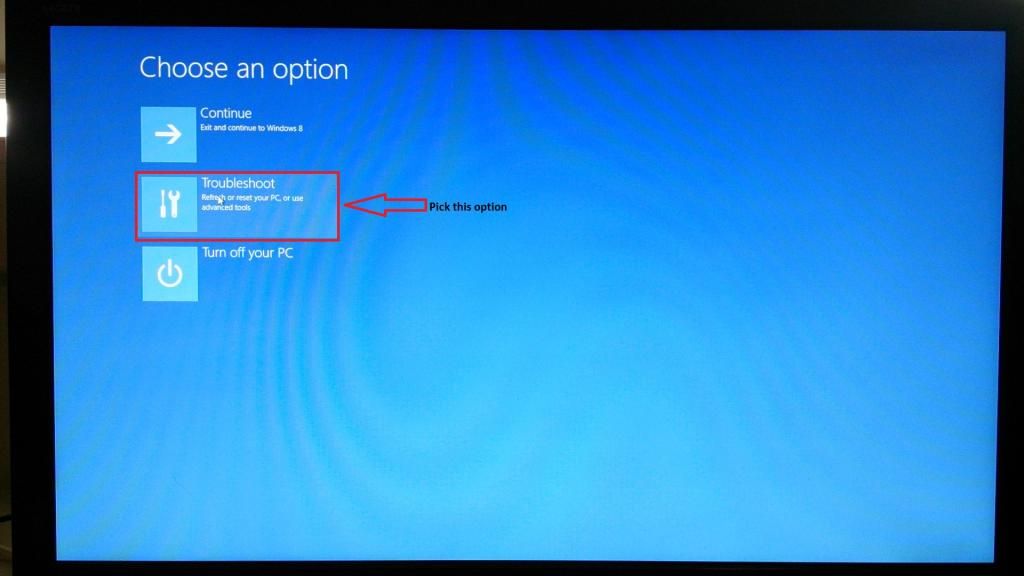
Step 4: When your PC restarts and goes to this screen click on "Troubleshoot" as shown in the picture below:


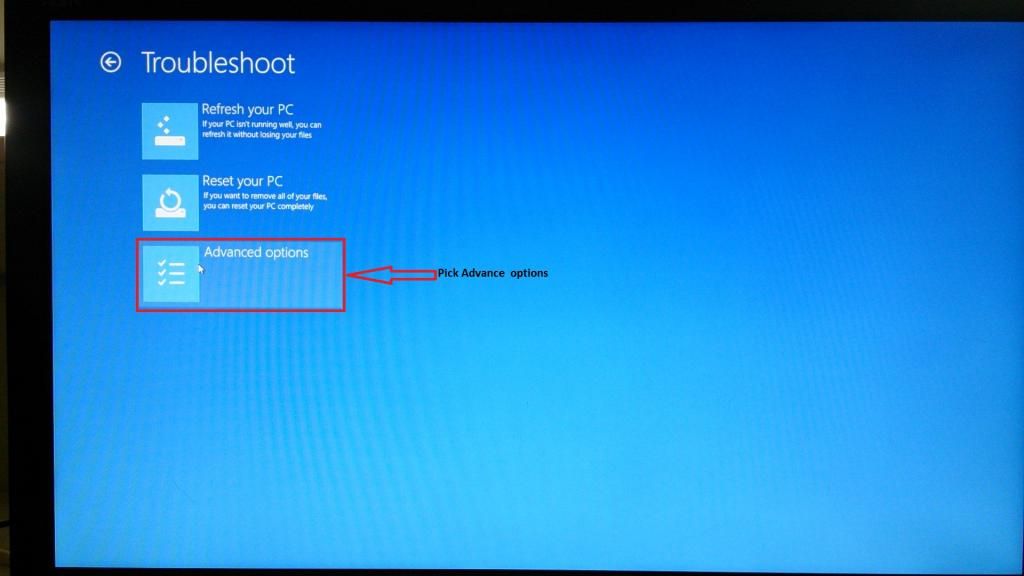
Step 5: Now click on "Advanced options" as shown in the picture below:


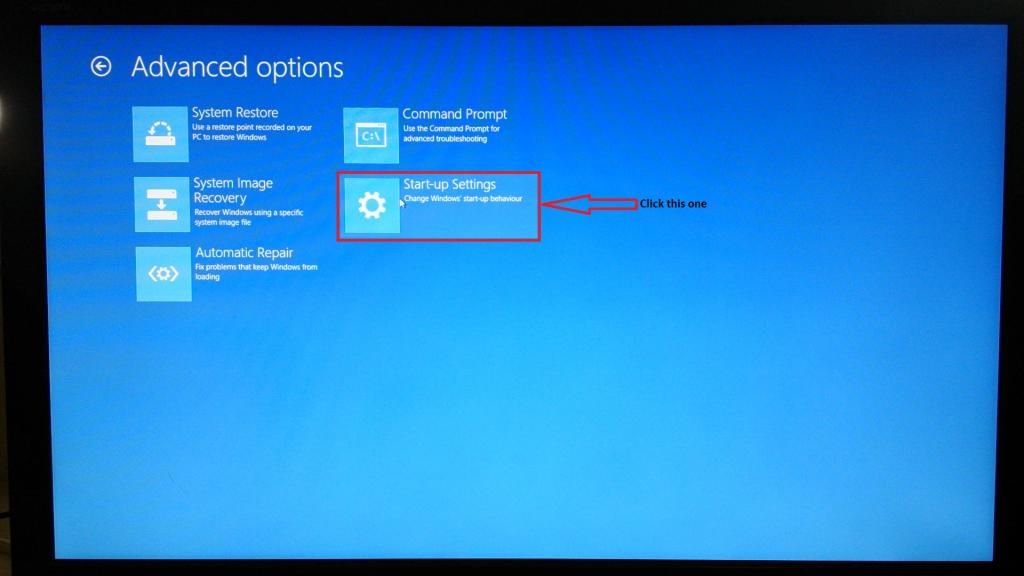
Step 6: Now click on "Start-up Settings" as shown in the picture below:


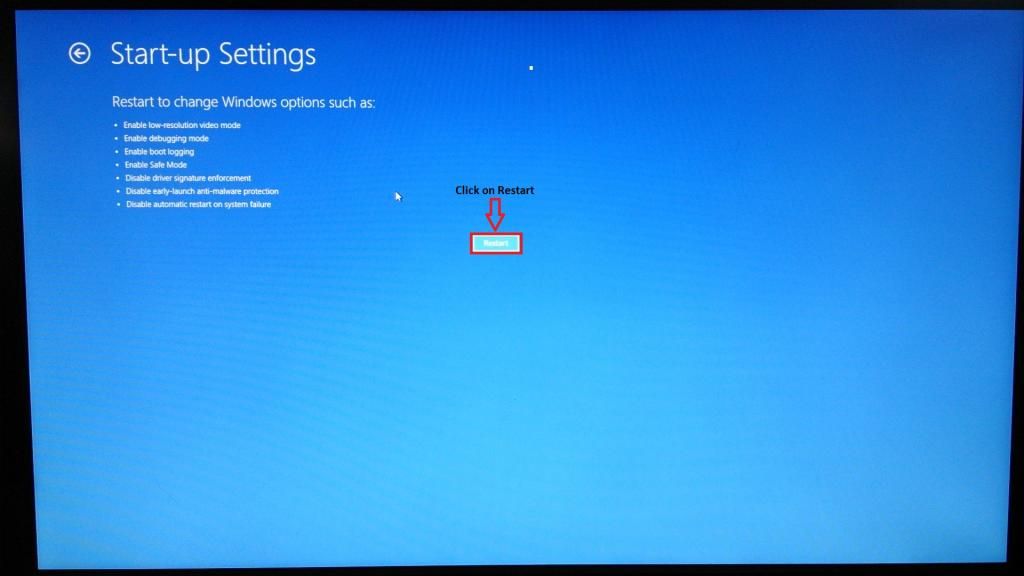
Step 7: When you get to this screen, click on the "Restart" tab as shown in the picture below:


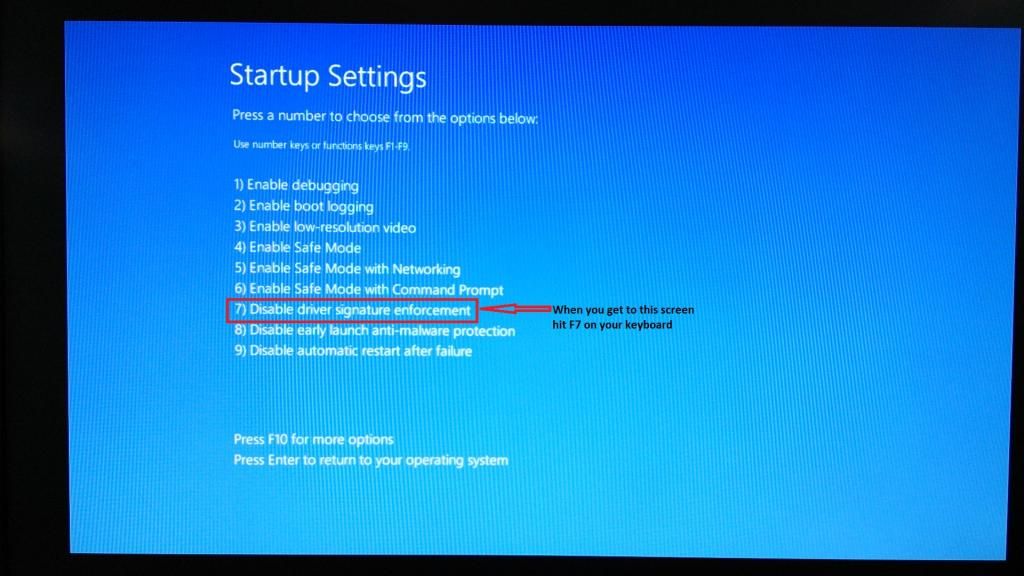
Step 8: Okay when you get to this screen just hit the "F7" on your keyboard:


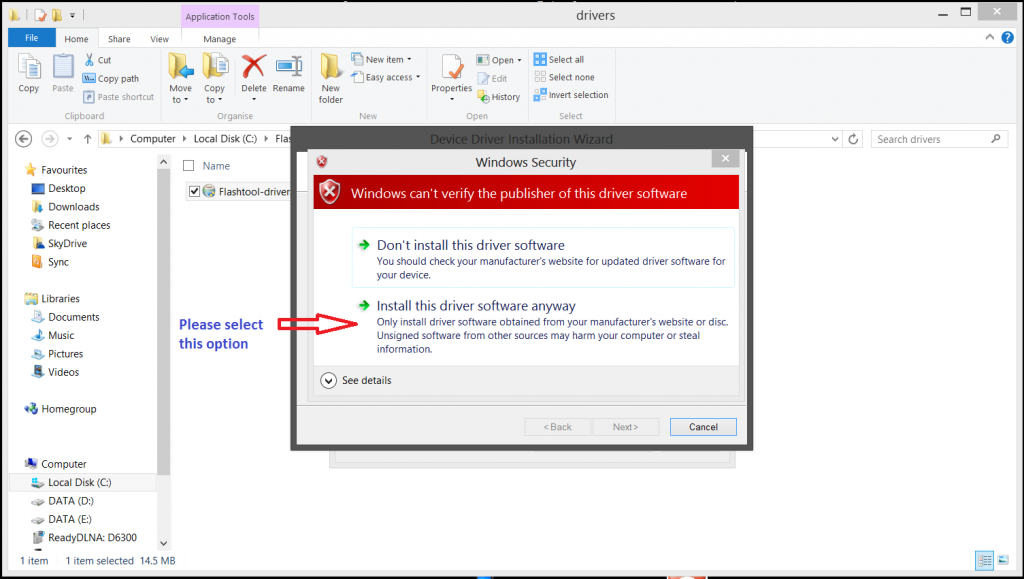
Step 9: Now go and reinstall the driver for the Xperia Z. When you get this pop-up window, please select "Install this driver software anyway" as shown in the picture below:


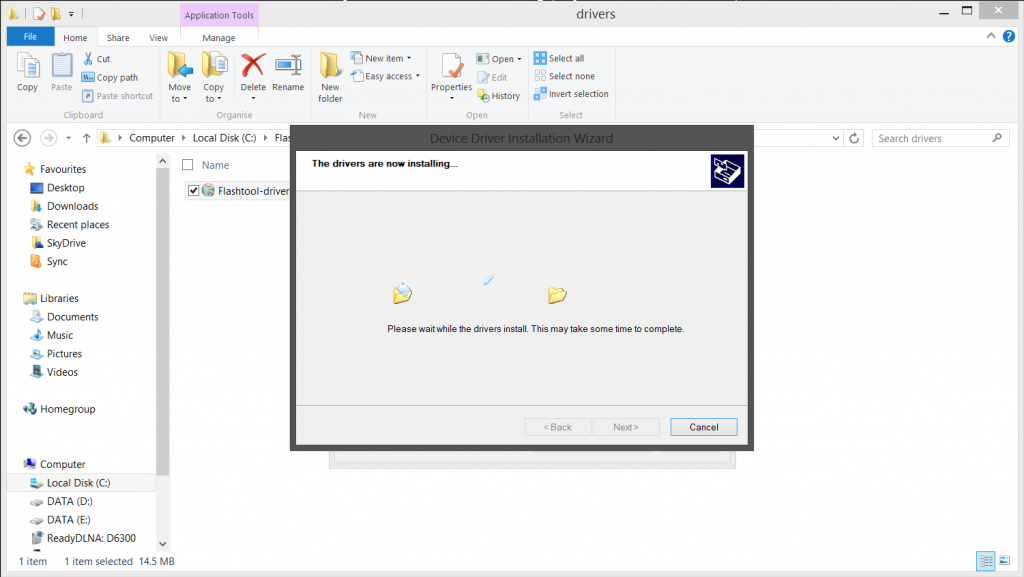
The process will look like this:


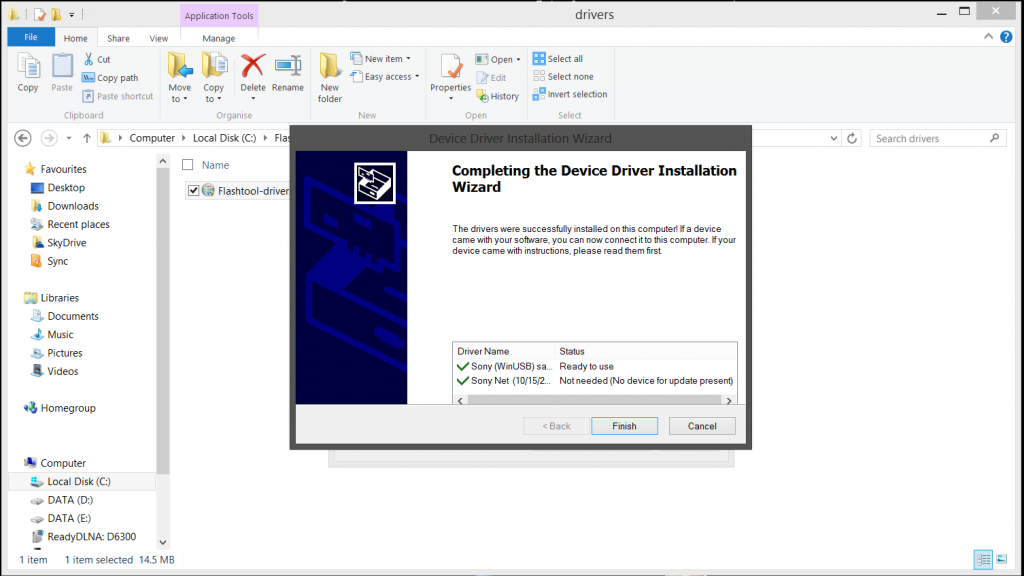
As you can see in the last picture that the drivers are now installed.

I hope that helps out people who are new to flashing the Xperia Z

Tuesday, August 25, 2015

Official ICS for Xperia Ray; xperia neo v and Arc S Also How to install Khmer Font with Keyboard and Khmer in Setting-SMS-HOME

Before begin this, you must Back up your Contact as well as Application because you will lose everything after Flashing the ICS Firmware
Require data:
This can be only done on PC
1. Official ICS:
- Xperia Ray (Firmware) : http://www.multiupload.nl/0IPWE7LCEO
- Official ICS firmware for Neo v : https://rapidshare.com/files/5015061....1.A.0.562.rar (extract to file tft) or : http://www.mediafire.com/?o4v5ttaqsjhv3aq (extract it)
- Arc S : http://eddy.uni-duisburg.de/bin4ry/L....0.562_NCB.ftf
2. Flashtool:http://uploaded.to/file/o2ho5m6u
3. Khmer Font: http://www.mediafire.com/?qwj1d7qtq2s1odn
Speacial Thank to Mr. SHMAXX for providing me this lovely Khmer Font which work almost 98.88%
on My phone
4. CWM-install: you might want to know more so please go to this link and download
http://forum.xda-developers.com/showthread.php?t=1390771
5. Khmer Keyboard: http://www.mediafire.com/?rvpafu51b7xxtfz
I got this one from Mr.Chhim Sathupheap.
How to Flash the ICS official Firmware
1. Extract Flash tool Into Drive C
2. U must Extract Firmware first/Copy the Officail Firmware to C:\Flashtool\firmwares
and U must also install the driver which locate in C:\Flashtool\drivers and during the installation process, u must tick all the option.
4. Put USB debugging one and also Tick the Unknow source in your Phone
5. Open Flashtool-> Click on the Flash ICON and choose-> Flash Mode
6. select your firmware and click ok ( wait until it ask to connect phone to PC )
7. connect your phone to PC via USB and follow on screen instruction
8. when it ask your phone to connect Fo:r
- Xperia Ray, Just hold down the Volume down tightly when plug into PC until the Flashing process appear.
- xperia neo v And Arc S hold back Key buttonអោយជាប់ដូចគ្នាមុននឹងដោត
9. The Phone will not boot up by itself you u need to Unplug and turn it on. If it say error just ignore it turn your phone ON it work simple
First boot will take a lot of Time So you wait maybe 5 minute or 10 minute
7. Enjoy your New version ICS on your phone
How to Install Khmer Font on Ray
***Before begin the installation, of course, you must root your phone first
To Root Please go to: -- http://bit.ly/ert_xperia_2011_ics_1 and Follow the on screen Instruction 
1. Extract Doomloard on desktop
2.Put USB debugging one and also Tick the Unknow source in your Phone connect to PC
3.open run.me on folder doomloard on dekstop that you extract it for root
4. Press Any key on your keyboard it will running wait untile it say finish
5. enjoy with rooting
How to install CWM
Install CWM: Go to This link and read about how to install CWM
http://forum.xda-developers.com/showthread.php?t=1390771
install-cwm1.cmd for Xperia Arc / Neo / PLAY/ Ray
install-cwm2.cmd for Xperia Mini / MiniPro / Active / Live With Walkman
2.Enable USB Debugging on device
3.Connect your device using usb data cable
4.Follow on screen instruction
How to Install khmer unicode font (Boot Into CWM)
1. Copy the .zip file into your SD card
(This File: http://www.mediafire.com/?qwj1d7qtq2s1odn)
Install It by CWM
2. Boot your phone in CWM mode after .
- How to boot Ray, Neo V, and Arc S, in CWM mode:
- press and release continuously(ចុចនឹងប្រលែងឲ្យញាប់) the volume down button after the Word Sony appear.
4.Once you are in the CWM recovery, use the volume keys to navigate upwards / downwards, the 'home' key to select, the 'back' key to go back.
5. Find the .Zip file and Install it then Restart
How to Install KeyBoard
Install : http://www.mediafire.com/?rvpafu51b7xxtfz
It is an APK file so there is nothing speacial.
After installed, go to Setting-> language and Inout and set Khmer Keyboard as default or just select it. U can also switch back and forth during typing.

** U can also install Multi link Keyboard in Play store if you don't like this one.

Translate Facebook App to Khmer: 
Credit: Mr. Prom Visoth
Translated Facebook is out for testers!Instructions: download https://www.box.net/shared/0251b1abb9e74dc939df and touch to install.* if it can't replace your current Facebook, uninstall it and also delete old Facebook from phone system app. Reboot. Now you should be able to install this.

Updated: 06/05/2012

How to Install Khmer On Setting-SMS-Home:
Credit: Mr. Prom Visoth
download: https://www.box.com/shared/f1e58060391883221e8e
Flash in CWM Mode; Then go to Setting- Language and Choose Khmer.

-I have tested on Ray and the Screen doesn't Fit Properly so go to 
Setting- Application - All - Xperia Home - and choose Clear data


*****Some people have reported an error or a slow down using the Flashing firware so i suggest that you should use PC companion to Up your Xperia Device if you want to use ICS. To get the official ICS or the latest Update, I suggest you debrand your device for the Nordic branding, Normally, Nordic Country always get the latest update sofware.

- To debrand your device to Nordic country please go to: http://www.wotanserver.com/en
The server will provide a client download to debrand your device.
It costs 1.99 Euro and it is comletly safe.

- U might need the free version. Yes you can.
To debrand your device, U need to Flash the old Gingerbrand of Nordic Countries.
Use the Flash tool to Flash the firware and then use PC Companion to to Update.
Firware Ray 2.3.4 of Nordic Country: 
http://www.bestandroidsolutions.com/xperia-ray-official-download-firmware-2-3-4-android-solutions.html